
The ‘pasteboard’ is an area outside of the InDesign page or spread which can be used to hold objects whilst working on page layouts.

When files are ready to output having objects hanging around on the pasteboard, which serve no purpose, can cause problems and confusion. It also means the file is larger and more complex than it needs to be. Extra image links, swatches, fonts, word counts and text extraction could all be affected.
This check verifies that all items are wholly or partially on the spread or within the bleed area. Objects that are only on the pasteboard and outside of the bleed area are flagged.
You can fix this problem by either moving objects within the bleed area or deleting them. A GreenLight tool is available to quickly remove all pasteboard objects at once (GreenLight menu Tools > Print Production tools panel > Delete pasteboard objects)

Adobe InDesign help on setting bleed
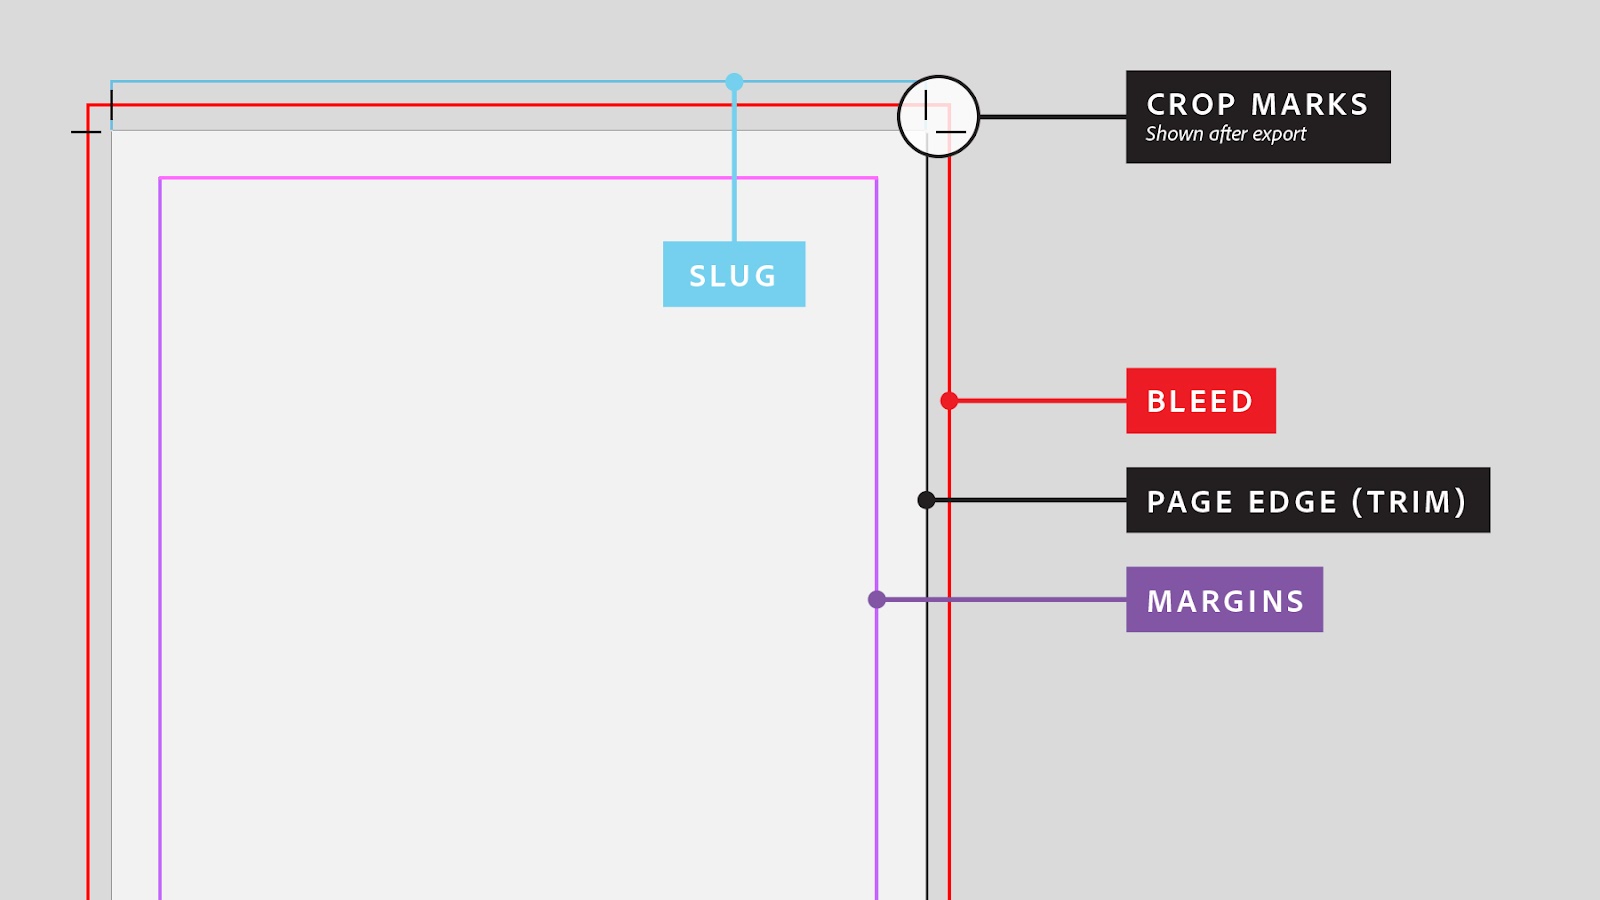
The slug area is outside of the InDesign page and can be used to store information that is not meant to be printed.
This might inthings like the file name, creation date, the name of the designer, or any internal codes that are relevant to the project. The slug area is indicated by a cyan line and can be on any of the four sides of the page or spread.

When files are ready to output, having objects hanging outside the slug area can cause problems and confusion. Also it means the file could be larger and more complex than it needs to be. Extra image links, swatches and fonts might be used, and word counts and text extraction could be affected.
This check verifies that all items are wholly or partially on the spread or within the bleed area or slug area. Objects that are only on the pasteboard and outside of the bleed area or slug area are flagged.
Fix this problem by moving objects within the bleed or slug area or deleting them. A GreenLight tool is available to remove all pasteboard objects at once (GreenLight Tools menu > Print Production tools panel > Delete pasteboard objects)
Adobe InDesign help on setting bleed
The ‘pasteboard’ is an area outside of the InDesign page which can be used to hold objects whilst working on page layouts.
When files are ready to output having objects hanging around on the pasteboard can cause problems and confusion. Also it means the file will be larger and more complex than it needs to be. Extra image links, swatches and fonts might be used and word counts and text extraction could be affected.
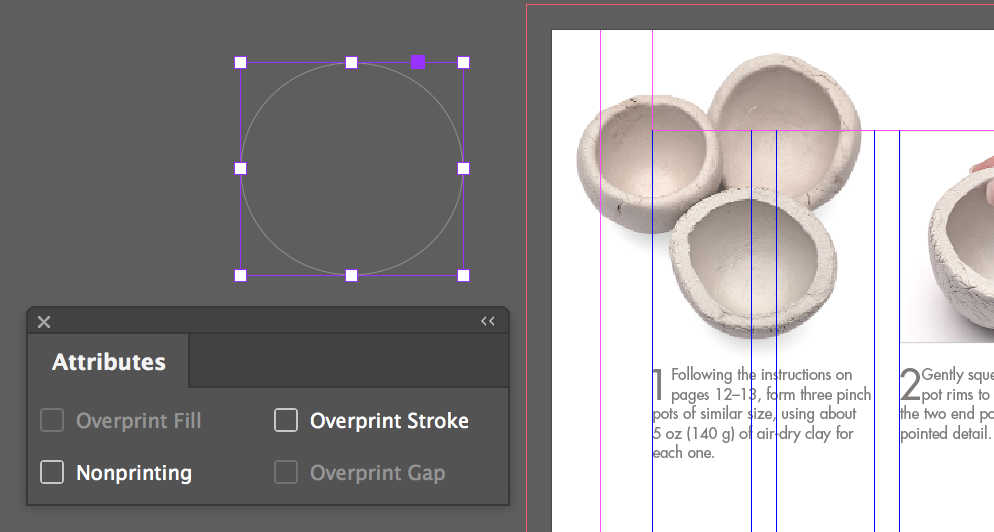
However, in some cases, notes or other objects may need to be retained for future users. In this instance selected objects can be set to non-printing in the InDesign Attributes panel (InDesign Window menu > Output > Attributes):

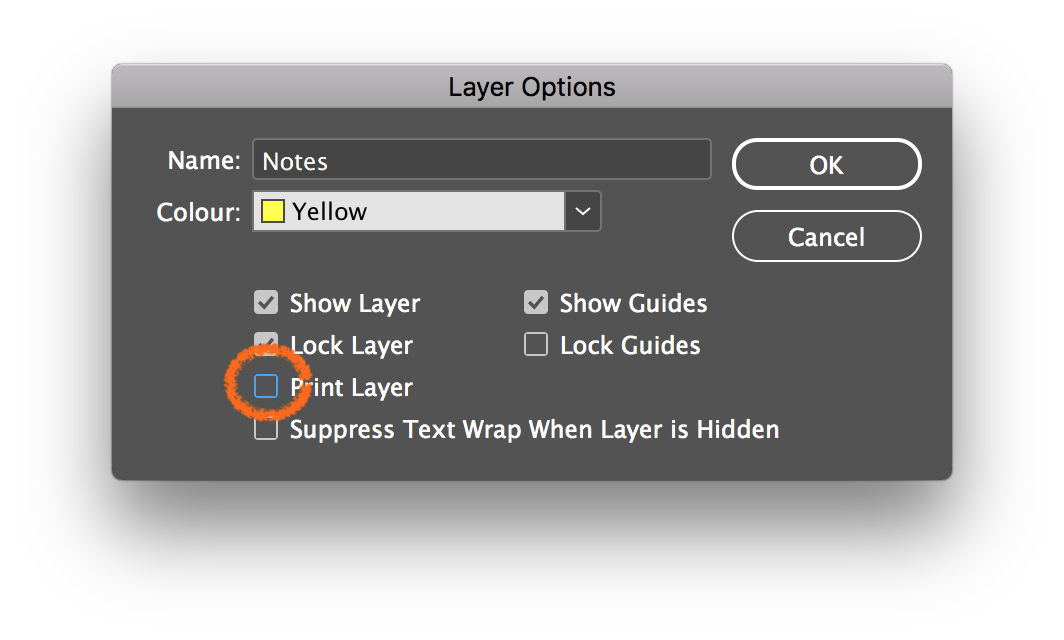
Another way is to make their layer non-printing. Choose InDesign Window menu > Layers and double click the layer name to see the Layer Options dialog. Make sure the layer is visible, uncheck Print Layer and click OK. Everything on the layer will become non-printing as a result:
This check looks at the position of the objects that are not set to non-printing and verifies that all printing items are wholly or partially on the spread or within the bleed area. Printing objects that are only on the pasteboard and outside of the bleed area are flagged.
Fix this problem by setting objects to non-printing, moving objects within the bleed area or deleting them.
A GreenLight tool is available to remove all pasteboard objects at once (GreenLight Tools menu > Print production tools panel > Delete pasteboard objects).