
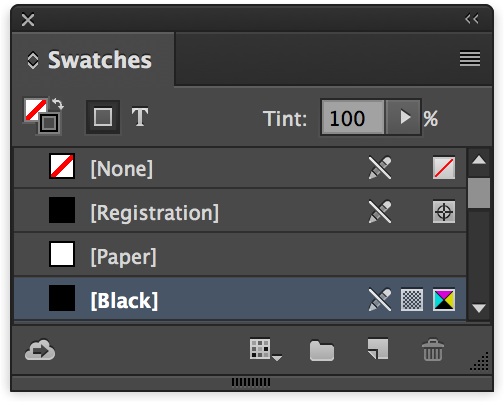
All images used on the text layer for interior and prelim pages are set to use the InDesign default colour [Black] swatch. No other colours or colour modes (such spot colours, RGB, Pantone or LAB) are used.
Any tint of [Black] from 1-100% is acceptable.
Avoid using 0% tints as this becomes white and can cause other production issues such as disabling overprinting.
Process Black using the InDesign default ‘[Black]’ is used for all text layer images:
Note: Images on any other layer including covers and jackets are not restricted to black only and overprinting in this way.
All images are set to overprint. This means that images can be changed during a print run without affecting the underlying base images and artwork.
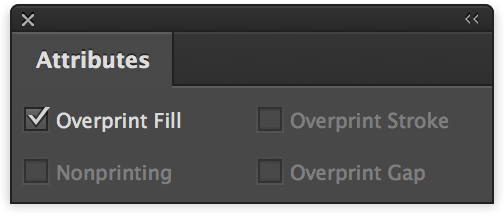
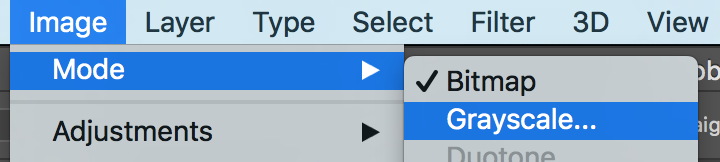
Bitmap images (referred to as ‘Black and White’ images in the InDesign Links panel) and Grayscale can be set to overprint using InDesign.
To apply overprint to pixel images it is important to select the content of the image frame rather than the frame itself. Do this using the InDesign Direct Selection Tool or with a graphic frame selected choose (InDesign Object menu > Select > Content).
With an appropriate image selected in this way, apply overprinting using the InDesign Attributes panel (InDesign Window menu > Output > Attributes):
It is possible to apply overprinting using the Illustrator Attributes panel (Illustrator Window menu > Attributes).
After selecting Illustrator artwork with the Direct Selection Tool tick the checkbox to apply Overprint Fill and/or Stroke:

Note: GreenLight is not currently checking vector artwork from Illustrator.
All text used on the text layer for interior pages is set to use the InDesign default colour [Black] swatch. No other colours or colour modes (such spot colours, RGB, Pantone or LAB) are used.
This applies to all text in text frames or on text paths that is on a translation layer and also applies to any stroke (border) colours applied as well as the more common fill (solid) colour.
Any tint of [Black] from 1-100% is acceptable.
Avoid using 0% tints as this becomes white and can cause other production issues such as disabling overprinting.
Process Black using the InDesign default ‘[Black]’ is used for all language text:
Note: Text on covers and jackets is not restricted to black only and overprinting in this way.
All text is set to overprint. This means that text can be changed during a print run without affecting the underlying base images and artwork.
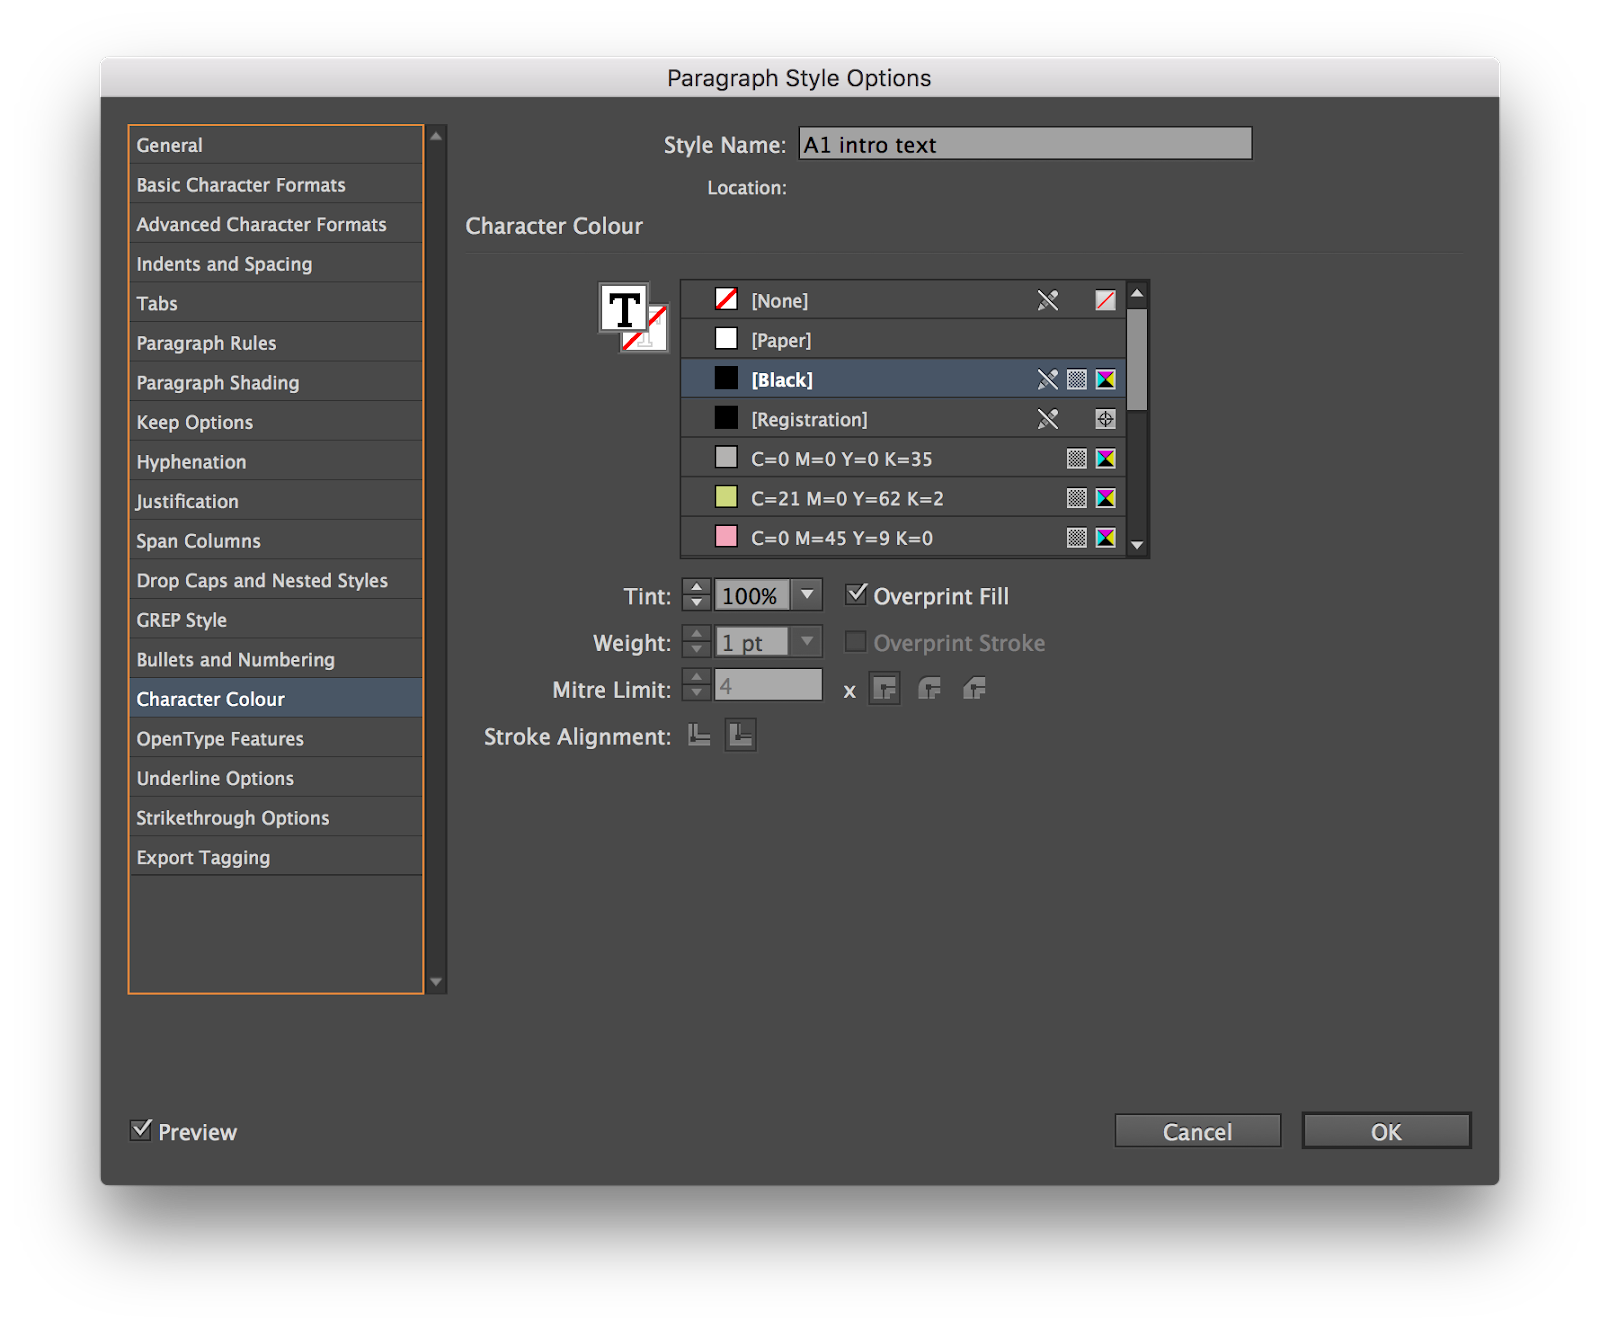
The easiest way to control most aspects of text styling is by using the Paragraph Styles (InDesign Window menu > Styles > Paragraph Styles).
Tick the Overprint Fill checkbox to apply overprinting.
If using Stroke then also tick the Overprint Stroke checkbox.
GreenLight comes with some free tools to speed up making modifications to your documents. Try the Overprint all Paragraph Styles tool in the GreenLight Print Production Tools panel (GreenLight Tools menu > Print Production tools panel).
It is possible to apply overprinting using the InDesign Attributes panel (InDesign Window menu > Output > Attributes):
After selecting text with the Text Tool tick the checkboxes to Overprint Fill and Stroke when available.
As well as being set to use the [Black] swatch and set to overprint, images and text used on the text layer should not use transparency.
Live transparency is an onscreen effect that needs to be resolved before printing. When transparency is removed (often called ‘flattening’) the results can introduce unwanted white boxes or influence the CMY plates.
A drop shadow is an example of an effect that uses the Multiply blend mode and transparency. As such, drop shadows should not be used on the text layer. Neither should gradients, glows and Bevel and Emboss and Feather effects.

For the text layer all images and text are set to 100% opacity and Normal blend mode.
Note: Images and text any other layer including covers and jackets are not restricted in this way.