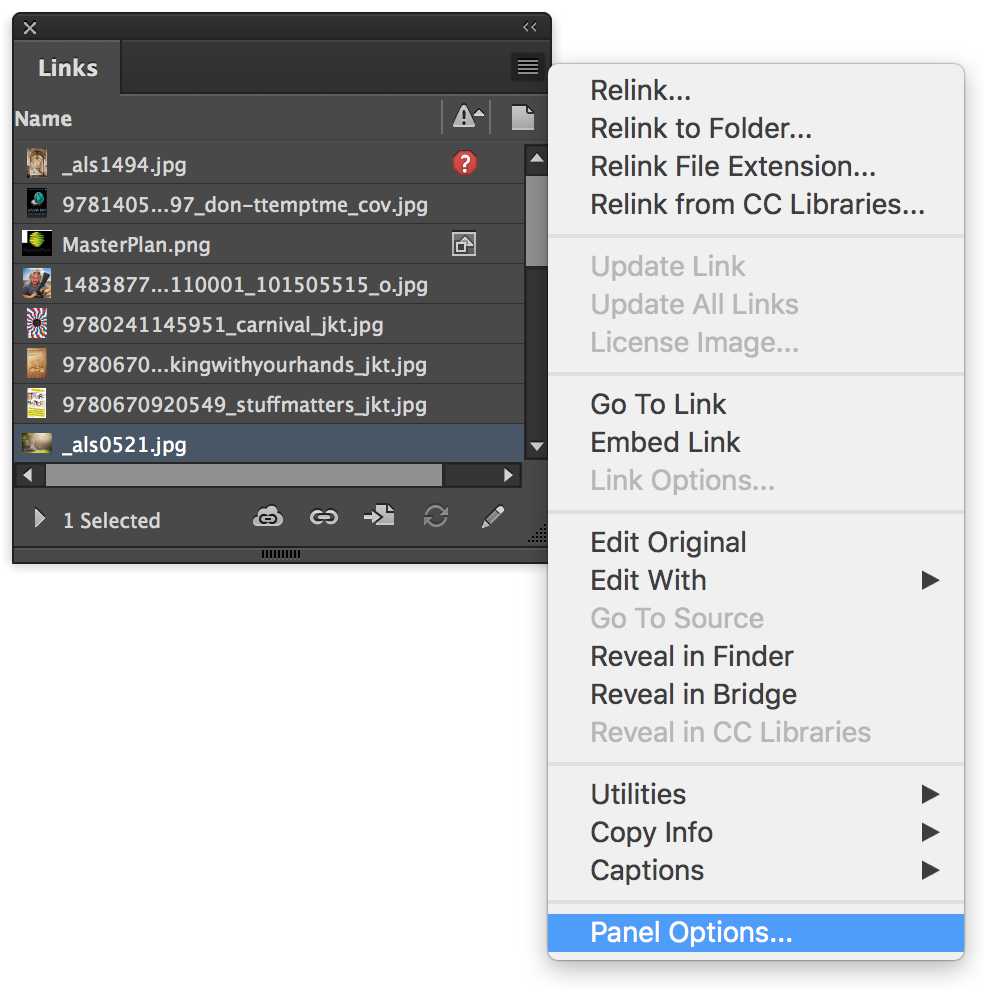

‘Links’ are made to the original files of images that have been placed into the InDesign document; they might also, less commonly, be text files.
When placing pixel images onto an InDesign page their original resolution (how many pixels the image has over a given measurement) becomes their Actual PPI.
Scaling the image up or down on the InDesign page does not alter the original linked image but does affect the PPI when outputting. The resulting resolution is referred to as the Effective PPI. Increasing the scale of an image causes the Effective PPI to go down; decreasing the scale causes the Effective PPI to go up.
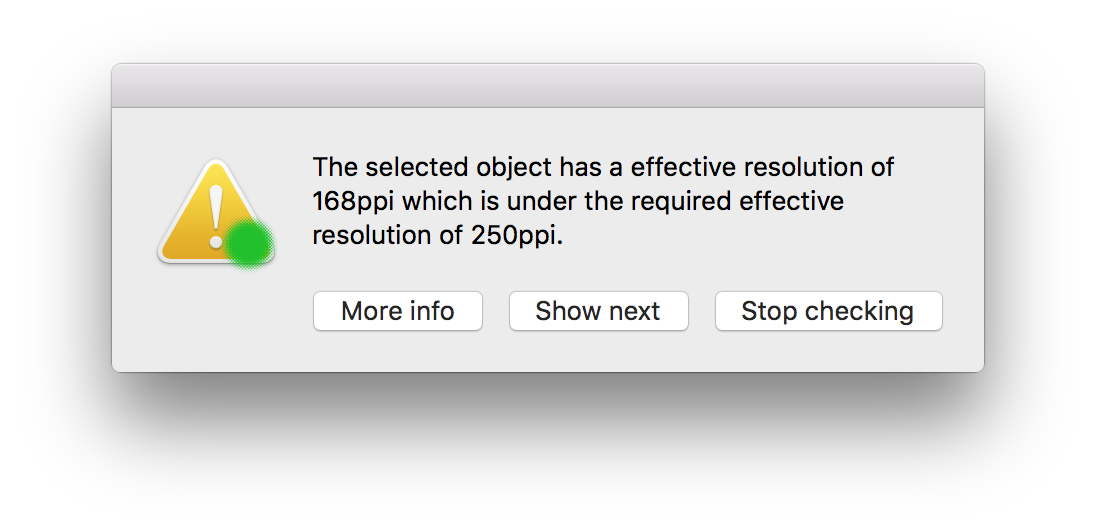
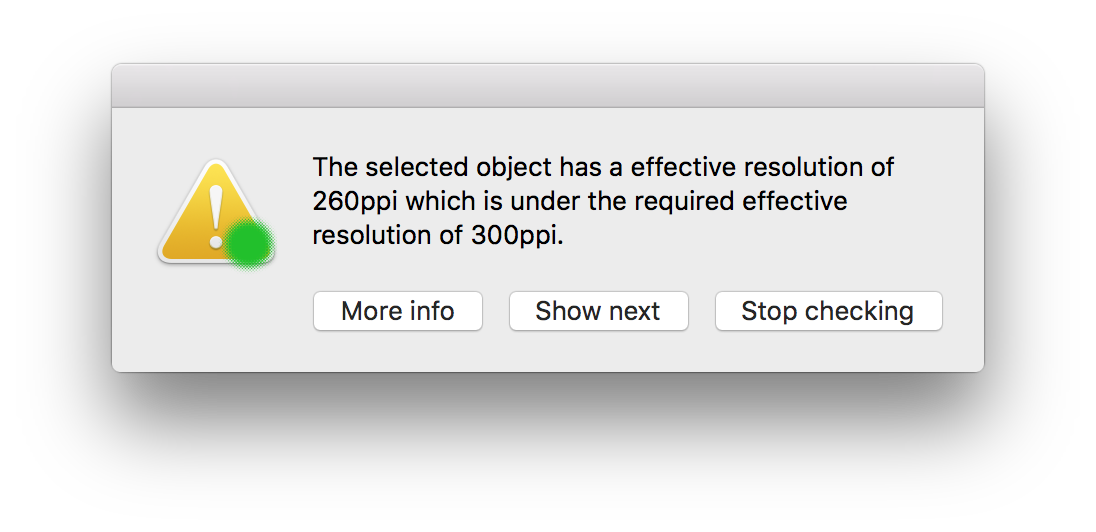
Scaling the image up so that the Effective PPI drops below 250 will result in less than optimal output.

Aside from file size issues, having too many pixels is rarely a problem. Having too few, however, can mean a loss of definition and image quality.
There may be times when an image is so good or unique that it needs to be used despite having a low effective resolution. Also a soft image e.g. a natural landscape and clouds can often be output at a lower resolution but still with good image quality. In either case, or when you simply don’t have an alternative, you can mark the image as OK when prompted by GreenLight.
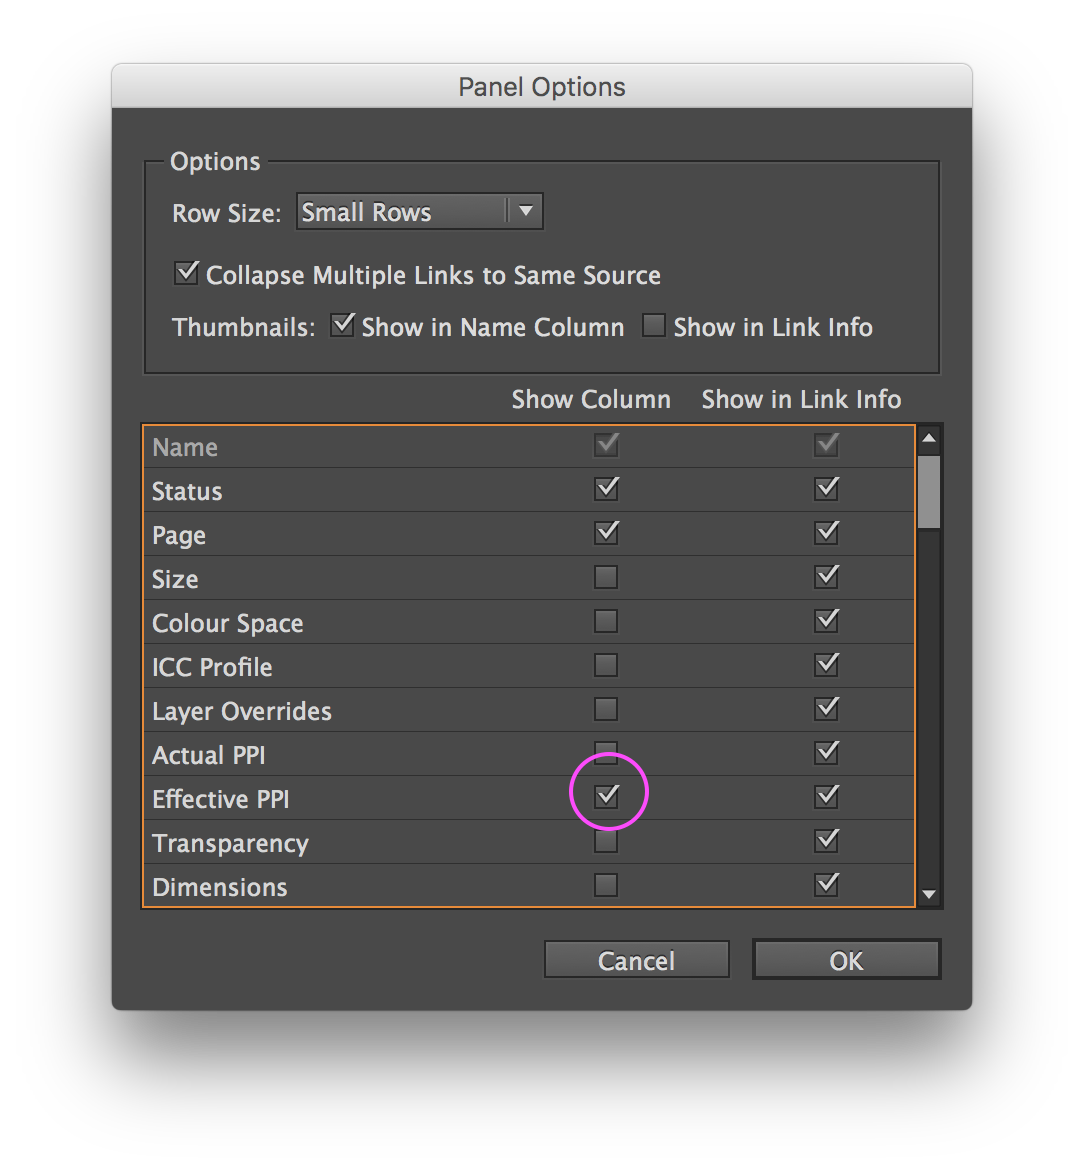
Tip: It is possible to switch on an Effective PPI column in InDesign's Links panel menu (Window > Links). From the Links panel menu select Panel Options:

In the Panel Options dialog under the Show Column heading click the checkbox for Effective PPI and click OK.

In the Links panel a new column appears indicating the Effective PPI of pixel images. You may need to adjust the widths of the columns or panel itself to see all the information.


‘Links’ are made to the original files of images that have been placed into the InDesign document; they might also, less commonly, be text files.
When placing pixel images onto an InDesign page their original resolution (how many pixels the image has over a given measurement) becomes their Actual PPI.
Scaling the image up or down on the InDesign page does not alter the original linked image but does affect the PPI when outputting. The resulting resolution is referred to as the Effective PPI. Increasing the scale of an image causes the Effective PPI to go down; decreasing the scale causes the Effective PPI to go up.
Scaling the image up so that the Effective PPI drops below 250 will result in less than optimal output.

Aside from file size issues, having too many pixels is rarely a problem. Having too few, however, can mean a loss of definition and image quality.
Fix this problem by sourcing a higher resolution versions of the same image, using an alternative image, or by marking the image as OK.
Tip: It is possible to switch on an Effective PPI column in InDesign's Links panel menu (Window > Links). From the Links panel menu select Panel Options:

In the Panel Options dialog under the Show Column heading click the checkbox for Effective PPI and click OK.

In the Links panel a new column appears indicating the Effective PPI of pixel images. You may need to adjust the widths of the columns or panel itself to see all the information.


‘Links’ are made to the original files of images that have been placed into the InDesign document; they might also, less commonly, be text files.
When placing pixel images onto an InDesign page their original resolution (how many pixels the image has over a given measurement) becomes their Actual PPI.
Scaling the image up or down on the InDesign page does not alter the original linked image but does affect the PPI when outputting. The resulting resolution is referred to as the Effective PPI. Increasing the scale of an image causes the Effective PPI to go down; decreasing the scale causes the Effective PPI to go up.
Scaling the image up so that the Effective PPI drops below 250 will result in less than optimal output.

An image’s resolution decreases as it is scaled up, which means a ‘high res’ image can effectively Aside from file size issues, having too many pixels is rarely a problem. Having too few, however, can mean a loss of definition and image quality.
There may be times when an image is so good or unique that it needs to be used despite having a low effective resolution. Also a soft image e.g. a natural landscape and clouds can often be output at a lower resolution but still with good image quality. In either case, or when you simply don’t have an alternative, you can mark the image as OK when prompted by GreenLight.
Fix this problem by sourcing a higher resolution versions of the same image, using an alternative image, or by marking the image as OK.
Tip: It is possible to switch on an Effective PPI column in InDesign's Links panel menu (Window > Links). From the Links panel menu select Panel Options:

In the Panel Options dialog under the Show Column heading click the checkbox for Effective PPI and click OK.

In the Links panel a new column appears indicating the Effective PPI of pixel images. You may need to adjust the widths of the columns or panel itself to see all the information.


‘Links’ are made to the original files of images that have been placed into the InDesign document; they might also, less commonly, be text files.
When placing pixel images onto an InDesign page their original resolution (how many pixels the image has over a given measurement) becomes their Actual PPI.
Scaling the image up or down on the InDesign page does not alter the original linked image but does affect the PPI when outputting. The resulting resolution is referred to as the Effective PPI. Increasing the scale of an image causes the Effective PPI to go down; decreasing the scale causes the Effective PPI to go up.

An image’s resolution decreases as it is scaled up, which means a ‘high res’ image can effectively become low resolution. Aside from file size issues, having too many pixels is rarely a problem. Having too few, however, can mean a loss of definition and image quality.
There may be times when an image is so good or unique that it needs to be used despite having a low effective resolution. Also a soft image e.g. a natural landscape and clouds can often be output at a lower resolution but still with good image quality. In either case, or when you simply don’t have an alternative, you can Mark as OK when prompted by GreenLight.
Tip: It is possible to switch on an Effective PPI column in InDesign's Links panel menu (InDesign Window menu > Links). From the Links panel menu select Panel Options:

In the Panel Options dialog under the Show Column heading click the checkbox for Effective PPI and click OK.

In the Links panel a new column appears indicating the Effective PPI of pixel images. You may need to adjust the widths of the columns or panel itself to see all the information.


‘Links’ are made to the original files of images that have been placed into the InDesign document; they might also, less commonly, be text files.
When placing pixel images onto an InDesign page their original resolution (how many pixels the image has over a given measurement) becomes their Actual PPI.
Scaling the image up or down on the InDesign page does not alter the original linked image but does affect the PPI when outputting. The resulting resolution is referred to as the Effective PPI. Increasing the scale of an image causes the Effective PPI to go down; decreasing the scale causes the Effective PPI to go up.
This means a ‘high res’ image can effectively become a ‘low res’ image with a low Effective PPI if scaled up too much.

Aside from file size issues, having too much resolution is rarely a problem. Having too little resolution, however, can mean a loss of definition and image quality.
Fix this problem by sourcing a higher resolution version of the same images or using an alternative image.
Tip: It is possible to switch on an Effective PPI column in InDesign's Links panel menu (Window > Links). From the Links panel menu select Panel Options:

In the Panel Options dialog under the Show Column heading click the checkbox for Effective PPI and click OK.

In the Links panel a new column appears indicating the Effective PPI of pixel images. You may need to adjust the widths of the columns or panel itself to see all the information.


‘Links’ are made to the original files of images that have been placed into the InDesign document; they might also, less commonly, be text files.
When placing pixel images onto an InDesign page their original resolution (how many pixels the image has over a given measurement) becomes their Actual PPI.
Scaling the image up or down on the InDesign page does not alter the original linked image but does affect the PPI when outputting. The resulting resolution is referred to as the Effective PPI. Increasing the scale of an image causes the Effective PPI to go down; decreasing the scale causes the Effective PPI to go up.

An image’s resolution decreases as it is scaled up, which means a ‘high res’ image can effectively become low res. Aside from file size issues, having too many pixels is rarely a problem. Having too few, however, can mean a loss of definition and image quality.
There may be times when an image is so good or unique that it needs to be used despite having a low effective resolution. Also a soft image e.g. a natural landscape and clouds can often be output at a lower resolution but still with good image quality. In either case, or when you simply don’t have an alternative, you can Mark as OK when prompted by GreenLight.
Tip: It is possible to switch on an Effective PPI column in InDesign's Links panel menu (InDesign Window menu > Links). From the Links panel menu select Panel Options:

In the Panel Options dialog under the Show Column heading click the checkbox for Effective PPI and click OK.

In the Links panel a new column appears indicating the Effective PPI of pixel images. You may need to adjust the widths of the columns or panel itself to see all the information.


‘Links’ are made to the original files of images that have been placed into the InDesign document; they might also, less commonly, be text files.
When placing pixel images onto an InDesign page their original resolution (how many pixels the image has over a given measurement) becomes their Actual PPI.
Scaling the image up or down on the InDesign page does not alter the original linked image but does affect the PPI when outputting. The resulting resolution is referred to as the Effective PPI. Increasing the scale of an image causes the Effective PPI to go down; decreasing the scale causes the Effective PPI to go up.

An image’s resolution decreases as it is scaled up, which means a ‘high res’ image can effectively Aside from file size issues, having too many pixels is rarely a problem. Having too few, however, can mean a loss of definition and image quality.
There may be times when an image is so good or unique that it needs to be used despite having a low effective resolution. Also a soft image e.g. a natural landscape and clouds can often be output at a lower resolution but still with good image quality. In either case, or when you simply don’t have an alternative, you can mark the image as OK when prompted by GreenLight.
Tip: It is possible to switch on an Effective PPI column in InDesign's Links panel menu (Indesign Window menu > Links). From the Links panel menu select Panel Options:

In the Panel Options dialog under the Show Column heading click the checkbox for Effective PPI and click OK.

In the Links panel a new column appears indicating the Effective PPI of pixel images. You may need to adjust the widths of the columns or panel itself to see all the information.
