
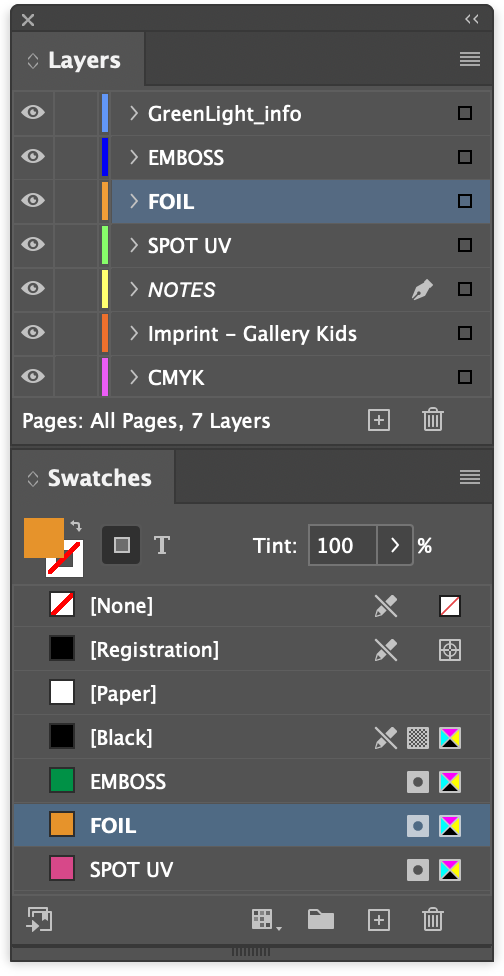
Special finishes are extra design embellishments often used on book covers including foils, embossing, diecutting and varnishes. They are represented in InDesign by the use of spot colour swatches on dedicated layers of the same name.
Special finish layers are individually checked and exported as Print ready PDFs to publisher requirements.
The option Add Special Finishes is offered when creating new covers via GreenLight Create menu > Create Cover and an additional dialog is shown where the finish(es) can be chosen.
See the step-by-step tutorial Creating print ready covers to publisher specs for more on starting new cover documents
Altenatively, special finishes can be introduced to a document at any time by choosing GreenLight Create menu > Add Special Finishes.
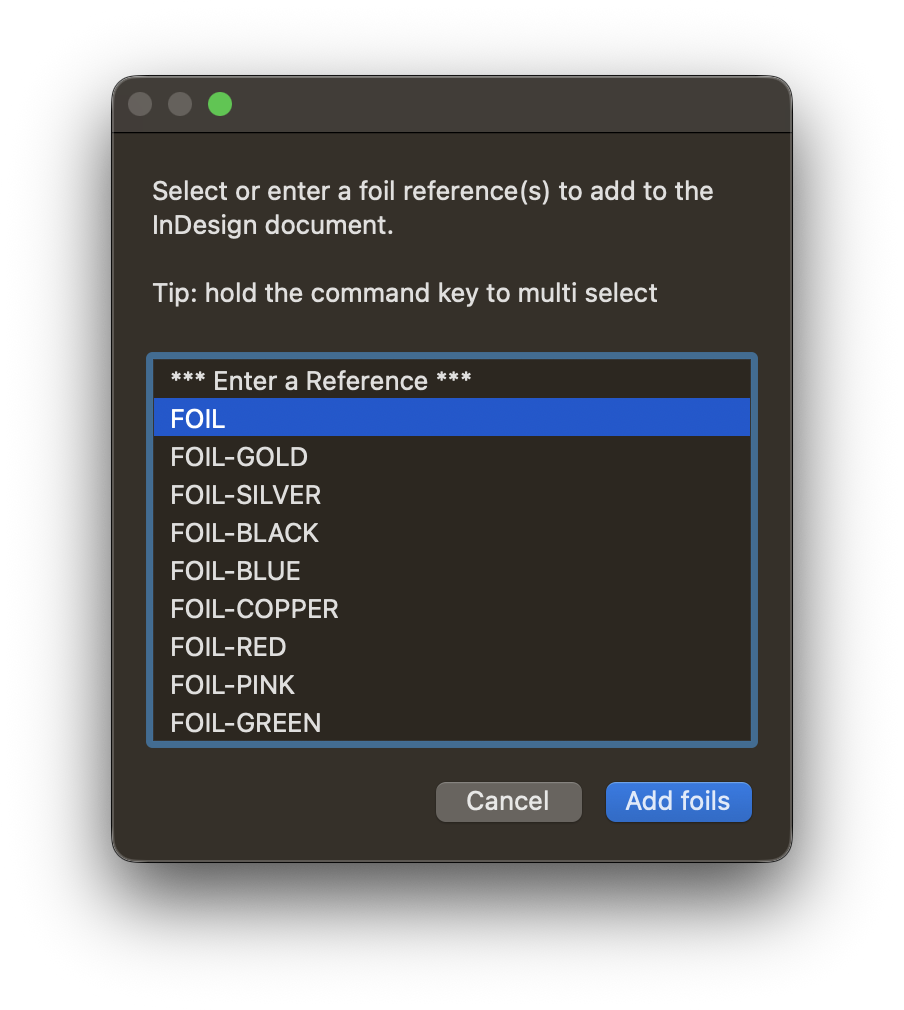
On opting to add special finishes, a dialog is shown to choose one or more special finishes by name.

(GreenLight Run menu > Make / Alter Cover) allows some changes to an open InDesign document that has been created from a template using GreenLight (see previous section). A dialog is shown for amending the book information and spine width.
Because the spine is a separate page in the spread, when amending the spine width any objects on the front cover, back cover and any flaps are neatly moved along with their page and in accordance with the spine change.
Changes to jacket style, trim page size or flaps are not offered as amendments. If these kind of changes to the jacket are required it is recommended that a new jacket is created and objects transferred using InDesign copy and paste in place.
GreenLight can be used to create, amend and export various styles of printed covers and jackets to the exact requirements of print suppliers and book publishers.

Measurement can be amended but typically these have the following specs:
These are various names used for the same cover type!
The initialisations PLC (Paper Laminated Case) / PPC (Printed Paper Case) / POB (Paper over Board) all refer to a printed cover file glued onto a hard cased book.
Arlin shares the same technical specs as a PLC and is a coloured paper stamped to achieve a cloth effect.
This is a PLC (Paper Laminated Case) printed cover file glued onto a hard cased book that is then trimmed off on top, bottom and outer edges.
A cover wrapping around front, spine and back of a paperback book.
A cover wrapping around front, spine and back of a paperback book with added flaps.
A paper jacket (also called a dust jacket) wrapping around a hard cased book.
A paper jacket wrapping around a hard cased book that is folded both horizonatally and verrtaiclaly.
A flexi bound cover uses a card stock that produces a more flexible medium cased book.
As above specs but with added flaps
A wiro bound cover consists of two printed cards producing either an open or cased wiro bound book.
A printed cover file with two sections glued onto outer edges of a hard cased book. The spine is covered with cloth and can be foil blocked.
As above but both the spine and a specified area of the cover are covered with cloth and can be foil blocked.
GreenLight automatically adds and populates the GreenLight Cover Info panel when creating and amending covers.
Running some GreenLight checks and adding special finishes will also amend this information.
This panel holds useful infomation for different people throughout the workflow and is typically included in the slug of Proof and Print PDFs.
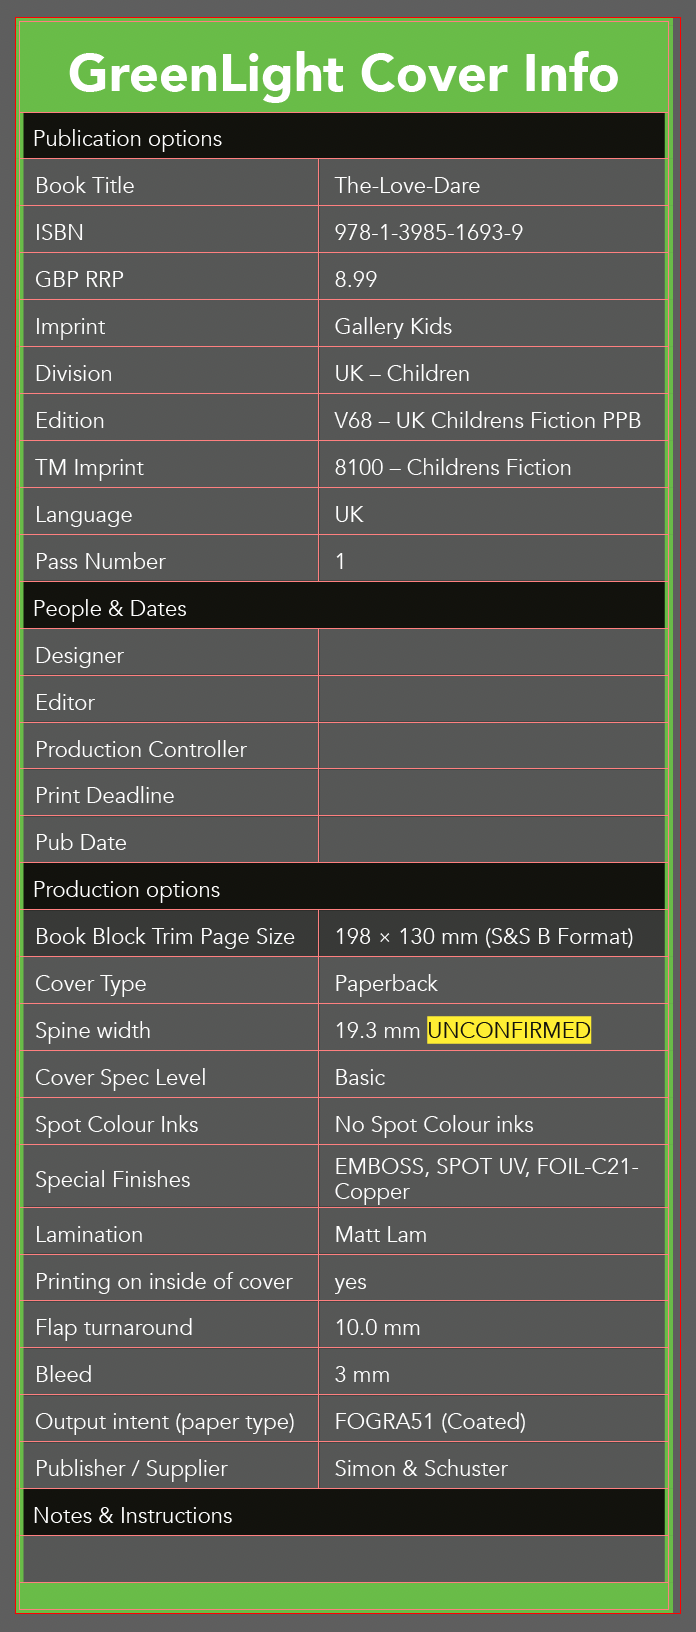
Information is split into catogories of:
NB: As GreenLight Cover Info is used by various GreenLight processes it best to update this info by choosing GreenLight Create menu > Amend cover
Tip: To add a coloured marker showing the relevant artwork stage:

The dimensions, style and name of the newly created jacket file is taken from the information entered into a dialog.
(GreenLight Run menu > Make / alter cover) opens a dialog for entering the book information and trim page sizes required.
If you wish to make a new jacket to match an existing internal file, open the internal file in InDesign before choosing the Make new jacket from template command and information such as book code, ISBN and trim page size will be brought into the new jacket dialog automatically.
Values are sense checked and you are prompted to change values if, for instance, you have chosen a jacket type that has flaps but have not entered the flap width.
With values entered, a new InDesign document is generated at the correct size for the jacket type with added extra bleed, 3mm overhang and 2mm turnaround as required. Use the Advanced Options check box to alter these assumed values.
The resulting InDesign document is a multi-page spread where the centre page is the spine. The front and back covers are different pages and if flaps are present then they make up a total of five pages in the spread.
Designing jackets using multiple pages make it easier to adjust the spine width, output just part of the cover or to export PDFs with accurate automatically generated crop and fold marks.
After the file has been generated you are prompted to save. Paste into the save dialog to use a valid file name for the jacket.
Extra layers and spot colours matching the publisher's File Creation Policy are included in the newly created file to help with the use of special finishes correctly.
Discard the layers and spot colours that are not needed.
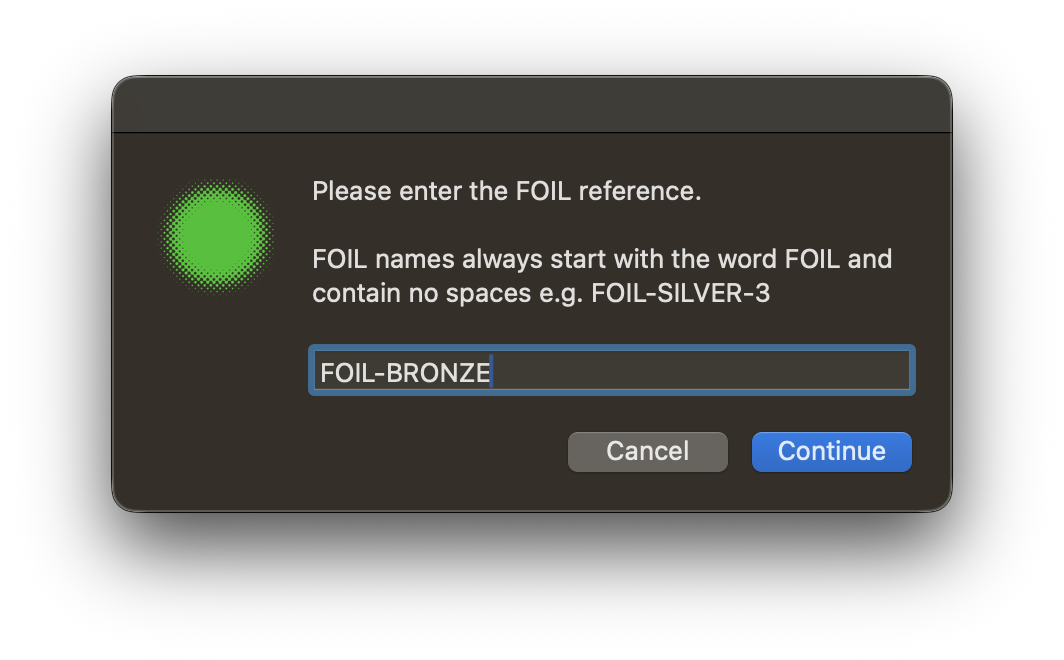
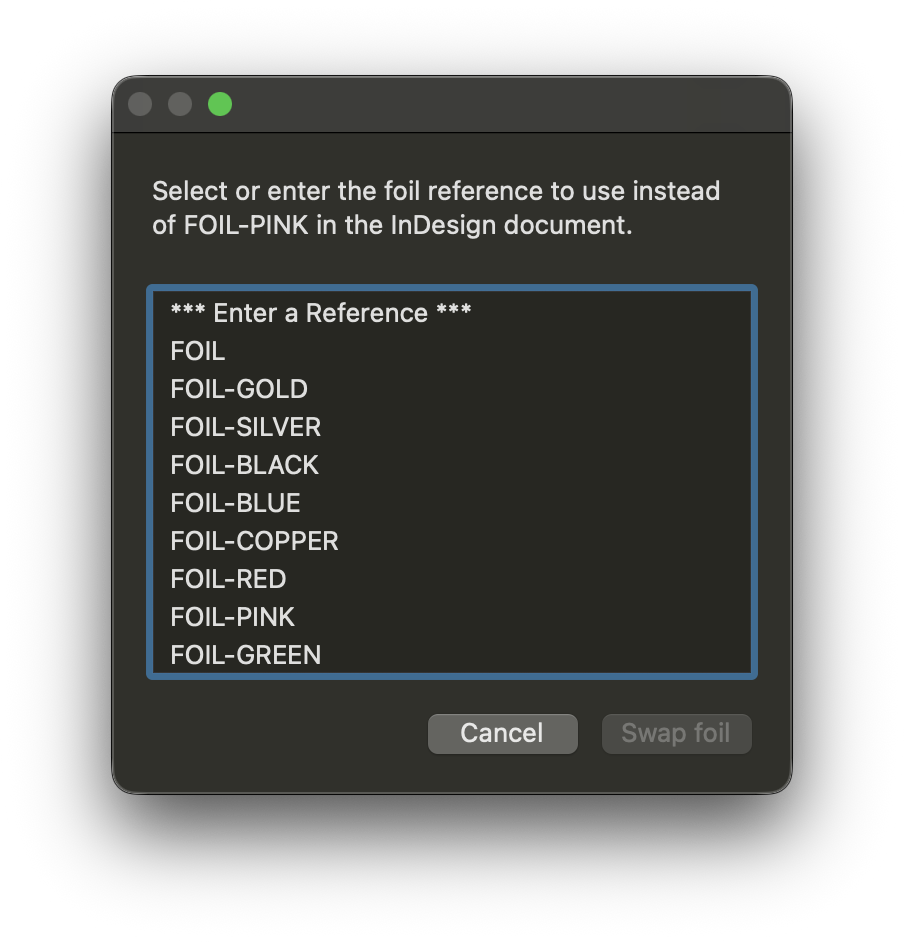
Foil references indicate the foil colour to apply in the production of printed books or for simulation e.g. for use in ShowCase or in marketing.
It may be necessary to change from one foil reference to another due to design or production considerations. If so, GreenLight can be used to switch to a new foil reference quickly and accurately.
To learn more on adding foils, see the step-by-step tutorial Creating print ready covers to publisher specs.
The previous layer name and swatch are swapped to the new foil reference and the GreenLight Info panel's information is updated.